AI node
Exciting News! Our 'AI node' is in the process of receiving some fantastic updates!
In this chapter, we are going to introduce you the updated user interface for 'Generative AI' node.
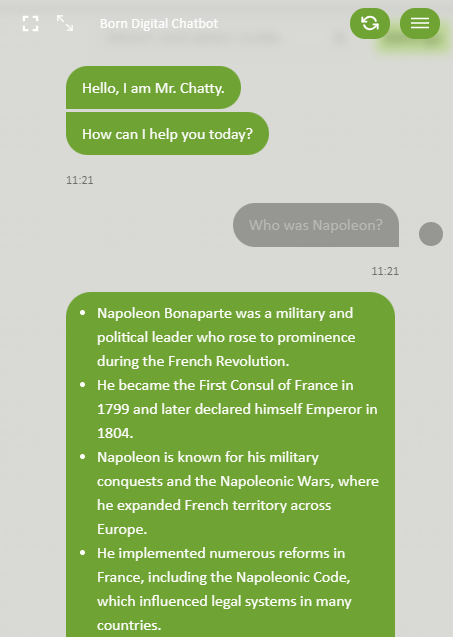
We've decided to create an infinite loop chatbot virtual assistant based on a simple prompt - system message. This is crucial for implementing the Generative AI within the Conversation Flow. We're excited to enhance its capabilities and explore various scenarios. To explain this, we've created a simple project. Watch the video below for a clear demonstration.
To understand and showcase the 'Generative AI' node effectively, we recommend visiting the 'Message' node, 'Answer' node, 'Training Project' , and 'Create Project' pages for detailed insights.

Step-by-Step Guide to Test It Out!
Create a simple 'Message' node as an example.
Develop a basic 'Answer' node with an intent to exit the conversation if the customer chooses to.
Create a new 'Generative AI' node and configure it to create a persona named Mr. Chatty:
Enter a recognizable name for the node.
Define a specific role for the system message.
Add new input fields for assistant content.
Keep {current_utterance} as the user's input in the third person.
Determine the usage of functions.
Configure the setup.
Connect the 'Generative AI' node to the 'Answer' node.
Train the model and conduct tests.
Understanding the AI Instructions
Clear and well-written instructions are essential for a delightful Generative AI experience by guiding the manual. In a specific scenario, we created a simple 'Answer' node to understand the conversation language, which can be incorporated into the system message prompt for the 'Generative AI' node.
Ensure the {current_utterance} variable is in the user input type for each iteration. The assistant further explains past actions before the user inputs.
Summary:
This is the initial text or prompt provided to the AI model, setting the context or guidelines for generating responses.
Description
The system message acts as the contextual cue for the AI model. It provides information about the topic, defines the assistant’s persona, outlines the response format, and instructs the AI on what to focus on or avoid in its generated responses. It primes the model with relevant information before generating the conversation.
Example
Perform as Company´s chatbot, you role is to respond to questions. Answer my questions only using information you receive as text snippets from Knowledge base.
Summary:
Varies based on the context and the system message input. Optional field
Description
The assistant's role is to generate responses based on the instructions provided in the system message. It uses the context, guidelines, and previous interactions to create suitable and contextually relevant responses for the user's queries or inputs.
Example
Please take a moment to familiarize yourself with the guidelines for our conversation:
These snippets may be unrelated.
Do not sumarise all of the facts received, use the most relevant part only
Always answer only in {language} language.
If needed, translate your response to {language}.
Current date is {date_now}
Please review the information available and be ready to assist customers with accurate information
Summary:
It contains the user's query or input as variable named - {current_utterance}
Description
This input represents the user's side of the conversation. It includes the queries, questions, or statements provided by the user, triggering the assistant's responses generated based on the context set by the system message. The AI processes this input to create appropriate replies.
Example
{current_utterance}
Checkbox" Use in each iteraction" can help you add the infinite number of loops and improve the desired outcome. Recommending to turn on for user´s utterance for 99% scenarios.
Try customize the system message
Try extending the system message yourself. For example, "Be brief in your answer; create longer answers for open-ended questions" or "Use bullet points for your answer."

Visit Prompting cookbookin our Tips and tricks section to get more in-depth explanation of prompt types, prompting techniques and prompt examples. ✨
Knowledge base - functions
Apart from generating customer responses, Generative AI can utilize a Function from our Knowledge Base to learn information. More details about the Knowledge Base will be provided soon after reworking this feature.
Knowledge baseThis integration allows our internal knowledge base to complement the Neural Language Processor, delivering optimal answers, even from internal information.
Configuration
Let´s explain the basic configuration
Use History: Default 3 - Choose how many messages stay in the conversation memory, useful for creating continuity.
Language Models: Default set to Standard, a cost-efficient general model. The advanced model, ChatGPT 4.0 Turbo, is significantly more expensive to use.
Advanced Settings: Set model temperature from 0 to 1 (default 0.7) to adjust the creativity level.
Don't forget to set up the Target node.
Try Importing the Project
For a step-by-step guide, visit the 'Import / Export' page to see the process.
Last updated
Was this helpful?