Born Digital - Documentation
  • Welcome
    • Welcome to Digital Studio
  • Digital Agent
    • Introduction
    • Workspace
      • List of Projects
      • Project Details
      • Deploy Project
    • Conversation Flow
      • User Interface Basics
      • Nodes Explained
        • MESSAGE node
        • ANSWER node
        • DECISION node
        • FUNCTION node
        • AI node
        • TRANSFER node
        • REDIRECT node
        • START / END nodes
      • Training set
        • Overview
        • Best practices for writing training set
      • Launching project
      • Setting tab
    • Building new projects
      • Knowledge base project
        • Step 1. - Initializing Your Project
        • Step 2. - Integrating AI Node
        • Step 3. - Finalizing with Testing and Training
        • (Optional) - Integrating a Knowledge Base Index
      • Advanced project
        • Step 1. - Establishing Functions
        • Step 2. - Crafting Greetings
        • Step 3. - Adding the AI node
        • Step 4. - Managing Flow Scenarios
        • Step 5. - Finalizing the Project
        • Step 6. - Training and Execution
    • Advanced functions
      • Knowledge base
      • New AI node property variables
      • Recordings
      • Statistics
      • Code editor
      • Widgets
  • For advanced users
    • Conversation design tips
      • Customizing speech synthesis
      • Customizing text output
      • Customizing smart functions output
      • Randomizing message content
      • Alternative messages based on variable values
      • Setting time-based greetings
      • Personalised URL links
      • Custom business statuses with variables
      • String slicing
      • Implementing chat buttons
    • Intent recognition tips
      • Fine-Tuning Intent Recognition using Generative AI
      • Multi-step intent recognition
      • Recognition based on named entity extraction
    • Prompting cookbook
      • Basics
      • Prompting techniques
  • Product changelog
    • Product changelog
  • Initial setup
    • Starting up
    • My settings
  • Contacts
    • Contacts for you
Powered by GitBook
On this page

Was this helpful?

  1. Digital Agent
  2. Building new projects
  3. Advanced project

Step 6. - Training and Execution

Congratulations on creating your first Virtual Assistant that knows your name!

PreviousStep 5. - Finalizing the ProjectNextAdvanced functions

Last updated 1 year ago

Was this helpful?

Before training the project, ensure you've activated the "Execute..." option in the advanced settings before the Generative AI node in the last message node. The project is automatically saved, and now it's time to train it by clicking the designated button.
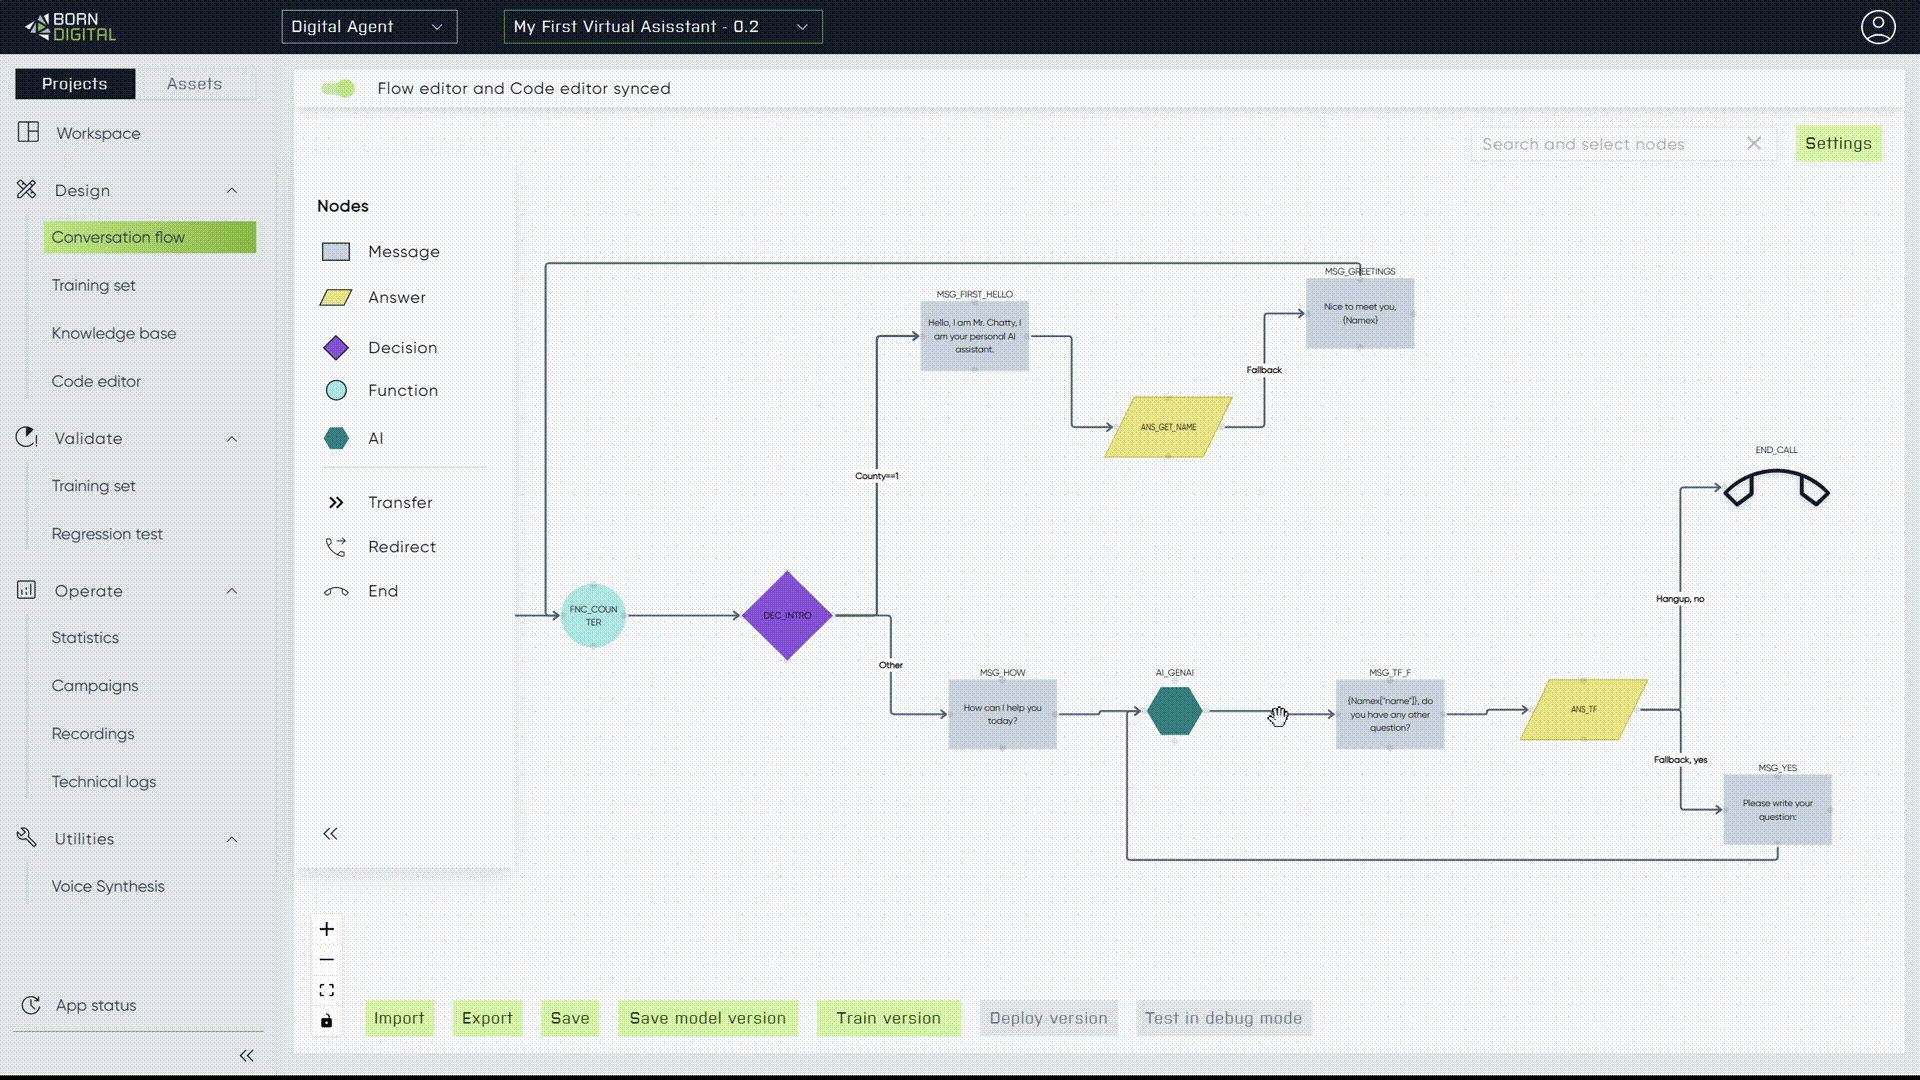
We intentionally used a two-line user name as an example. We elucidated the usage of the "namex" function back in Step 2. Feel free to modify or delete these sentences based on your requirements.

Wanna know more about project deployment?

Step-by-step
  1. Review and reconfigure the message node connected to the 'Generative AI' node, ensuring that the checkbox for "execute" is selected.

  2. Validate the logic of the entire flow to ensure smooth functioning.

  3. Initiate the training process by clicking the "Train version" button. If any errors arise, carefully review the provided information and improve the problematic node(s) accordingly.

  4. Interact with your newly created Virtual Assistant by clicking on the Chat Bubble and engaging in a conversation.

You've now successfully developed your First Virtual Assistant!

Even minor alterations in the Conversation Flow necessitate retraining the version. Ensure you untrain and retrain the version to implement and observe any updates or modifications made.

The displayed message: {'name': 'John', 'surname': 'Swain'} showcases the specific details retrieved by the "Namex" function. You can extract particular parts for usage purposes as demonstrated in .

Step 2
Visit this page
Step 6. - Training and Execution